Plan to Bake It Right

Plan to Bake It Right – FUNDAMENTAL FACTS – PART I
The two most important points to follow in baking bread the right way are:
1. Put good dough which has been cared for properly, into the oven when the dough has just reached the right stage of lightness.
2. Have the oven hot enough when you put the dough into it. Put the dough into an oven that has been heated to 450°F.
If the dough is too light, you will have poor bread with a coarse texture. If it is not light enough, the baked bread will be coarse and heavy.
When the oven temperature is too low, the dough goes on rising and gets much too light before the cell walls are set. This results in poor quality bread with some of the faults you read about back in the temperature pages.
The bread may come out of the oven with shell crack, shell top, or overhang. Use these tests to tell you when the dough is just “ripe” for baking.
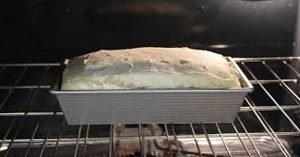
1. Press the little finger gently into the dough at one corner of the pan. If the dent stays in, the dough is ready to bake. If it does not, the dough needs more time.
If the dough collapses around the dent, it has gone beyond the point of being just right. It is too light.
2. Note the volume increase. The dough at this stage may be just doubled in bulk, or slightly more, or slightly less than doubled. This will depend on the kind of flour used.
3. Make a cardboard gauge. We have worked out one test in Utah which many homemakers use to tell when the dough is ready for the oven. We make a cardboard gauge with the right size opening.
We put this over the pan of rising dough at intervals, to tell us just when the dough is light enough to go into the oven.
White dough made from all-purpose flour, using our standard recipe, will be ready to bake when it is 33⁄4 inches above the bottom of the standard-size loaf pan.
The whole wheat dough will be ready when it is 31⁄4 inches above the bottom of the pan.
MAKE THE CARDBOARD GAUGE THIS WAY
Cut two pieces of heavy cardboard 12 inches long and 6 inches wide. Cut an opening in one card 51⁄2 inches
wide and 33⁄4 inches high.
This makes the gauge for white dough. Cut the opening in the second card 51⁄2 inches wide and 31⁄4 inches high. This measures the whole wheat dough.
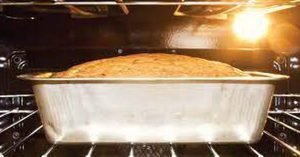
HAVE THE OVEN READY
Make sure that the oven is ready for the bread when the bread is ready for the oven. Place the oven rack so the center of the loaf from the top to bottom will come in the center of the oven from top to bottom.
If your oven bakes unevenly, put the rack higher or lower as needed to insure uniform browning on the top and bottom of the loaves.
Some of the newer ranges have ovens deep enough to bake two layers of bread at the same time. When you bake two layers at once, place the pans of dough in the oven so the loaves on the top rack are not directly above the ones on the lower level. This alternating of the loaves will permit better heat circulation.
Put the loaves into an oven that has been pre-heated to 450°F. Bake at this temperature for the full 35 to 45 minutes, unless your particular oven browns the bread too fast on top.
If you have this trouble with your oven, keep it at 450°F for the first 15 or 20 minutes. Then turn it down to 400°F or 425°F.
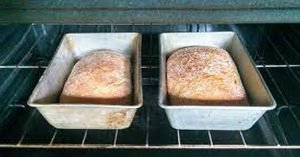
This high temperature at the beginning will stop the yeast action and set the cell walls so the bread will not get too light.
When you open the oven door too often to look at the bread inside, you will need to increase the baking time.
We have better bread in Utah’s high elevations when we bake it for a shorter time at 450°F than when it goes into a cooler oven for a longer time.
Good bread shows a good “oven spring.” This develops from the right combination of oven heat and the stage of lightness of the dough.
This combination permits a quick rising of the dough, followed by a quick setting of the cell walls during the first 10 or 12 minutes before the browning of the loaf takes place.
When the bread has baked long enough it will shrink slightly from the sides of the pan. It sounds hollow when you thump it.
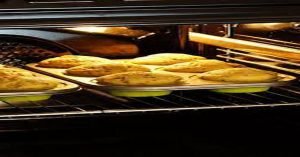
Remove the bread from the pans onto wire cooling racks as soon as the loaves come out of the oven. Let the loaves cool completely before you wrap them and put them into your bread can.
The plastic bags made for storing frozen foods are good for keeping bread fresh. They are available in the right size for holding one loaf of bread.
