Practice Easy Kneading
Table of Contents
Practice Easy Kneading – FUNDAMENTAL FACTS – PART I
The kneading process blends all the ingredients thoroughly. It stretches the gluten to develop the elastic framework which holds the gas that is formed by the yeast.
Kneading distributes the gluten framework or cell walls completely through the dough. Proper kneading makes these cell walls thin and tender as well as more elastic.
AVOID TOO MUCH DOUGH
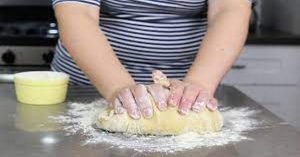
Some homemakers fail to do a good job of kneading because they make too much dough at one time. A four-loaf batch is as much as most women can knead efficiently by hand.
If you have a bread mixer, you can manage more dough at one mixing. The larger batches make too much dough to knead effectively to develop the thin cell walls which make up the structure of really good bread.
If you want to bake more than four loaves of bread in one day, mix two or more separate doughs. Time them far enough apart so the first will be baked before the second is ready for the oven. This will give you much better bread than if you try to knead too much dough at one time.
KNEAD ON THE CANVAS
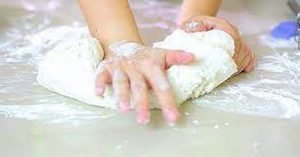
Do the kneading on a canvas-covered board. Rub flour well into the canvas before you start to knead the dough. Use the least amount of flour possible to make a smooth, but slack, or soft dough. You can handle a softer dough on a canvas-covered board than when you knead the dough directly on the floured board.
KEEP THE DOUGH SOFT
A soft dough makes better bread. A stiff dough rises slowly and makes the bread or rolls
coarse in texture with thick cell walls.
Let the dough rest 10 to 15 minutes after you mix the ingredients and before you start the kneading. The dough will be less sticky and easier to handle.
LEARN TO KNEAD EFFECTIVELY
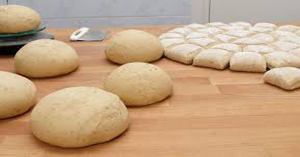
You can learn to knead the dough effectively with very little back work. Many women get a lot of backache and finger exercise, while they do the kneading, and then end up with a dough that still is under kneaded.
Keep your back straight while you knead the dough. Bend forward from your hips and not from your waistline. You will be less tired. Let the push come from your shoulder through the heels of your palms (the part of your hand nearest your wrist).
Keep your fingers curved above the dough. Use them just to turn the dough over, so you will have a fresh part to push away from you.
You can turn the dough over with your curved fingers, without pressing hard enough to leave any finger dents in the dough. You can turn the dough around one quarter with each push by using a little more pressure on one hand than on the other.
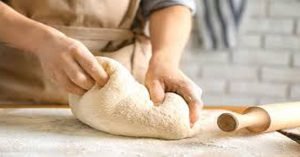
Develop a rhythm as you do the kneading. This makes it easier on you and more effective on the dough. Learn to knead the dough quickly and easily.
As you do this kneading, a smooth skin develops on the surface of the dough. Avoid pushing the dough in such a way that you tear the surface of the skin.
These breaks will make a poor texture on the inside of the finished bread. They also make the dough stick to your hands. You can knead with a firm push without tearing the dough surface.
RELAX THE DOUGH
If the dough seems tense and hard to handle during the kneading, instead of elastic and pliable, pick it up and throw it hard onto the kneading board a few times.
This will relax the dough and shorten the kneading time.
The dough which is too stiff or too cold is hard to knead. It takes more time to bring it to the finished stage. Avoid chilling the dough during the kneading.
Do the kneading away from drafts and away from an air conditioner. These drafts will dry the surface of the dough and give it wrinkled skin.
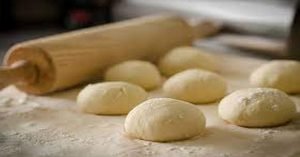
HERE ARE THREE STEPS TO FOLLOW IN KNEADING
Continue the kneading rhythm for 10 or 15 minutes until:
1. The dough is smooth and satiny and has many little blisters just under the surface.
2. The surface of the dough looks tightly stretched.
3. The dough feels springy and elastic.
4. The dough does not stick to the canvas or your hand. Hold your hand lightly on the dough while you count to 30. If the dough has been kneaded enough, it will not stick to your hand.
When the kneading is finished, put the dough into the oiled container. Turn the dough over so there will be a film of fat on the top. Cover tightly and keep away from drafts. The light film of fat and the tight cover will keep a crust from forming on the dough as it rises. Our dry, windy atmosphere in Utah will dry the dough surface if it is not tightly covered. A large plastic bowl cover, or a damp cloth, will help to prevent the drying.
Keep the dough at 85° to 90°F until it is ready to punch down. Use the “ripe test” (described later) to tell when the dough is ready for its first “punch down.”
Read more:
