Develop Skills in Molding
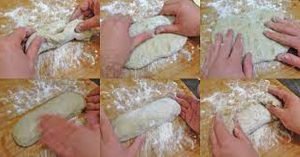
Develop Skills in Molding – FUNDAMENTAL FACTS – PART I
There are several good ways to mold the dough into loaves. The one described here is a method that many Utah homemakers and 4-H club members have used to mold loaves that are symmetrical in shape on the outside, and which have uniformly good texture on the inside.
Mold the loaves on the canvas-covered kneading board without putting more flour on the canvas. If you kneaded the dough to the right stage before you put it to rise, you can mold it into loaves without it sticking to the canvas or your hands.
The flour which you mixed and kneaded into the dough, in the beginning, has gone through several changes during the fermentation period.
If you put more flour onto the kneading board or canvas when you mold the loaves, you will have heavy streaks of unfermented flour in the finished bread. This makes the bread unattractive as well as unpalatable.
Do not put fat on your hands before molding the loaves, or you may have streaks of fat where the dough will not seal together. This will leave cracks inside the finished loaf.
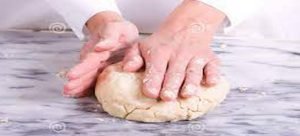
LEARN TO MOLD THIS WAY
Divide the finished dough into the number of loaves you are making. Roll each piece into a ball and cover to prevent drying while it rests for 10 minutes. After each ball of dough has had its final rest period, mold the loaves this way:
1. Flatten and pound the ball of dough into an oblong shape with the palms of your hands. Pound the gas bubbles out of the dough. Keep the corners square. Have the dough about 10 inches long and 6 inches wide.
2. Fold the dough in half lengthwise with the folded side toward you.
3. Press out the air by pushing from the folded side. Seal the open edges of the dough by pressing firmly with the edge of your palm.
4. Lift the folded dough with both hands. Be careful to hold the dough far enough in from the ends so your fingers will not break through it. Slap the center of the dough gently onto the kneading board. This relaxes and lengthens the dough. At this stage, it will be about 15 inches long and 5 inches wide.
5. Place the lengthened piece of dough on the kneading board parallel to your body. Fold almost one-third of the dough back on itself. Keep the corners square. Start from the folded edge, and press out all the air and gas bubbles. Seal the open edges with the edge of your palm.
6. Fold the remaining third over the other two layers. Press out the air and seal the edges. Keep the corners square. The folded dough will be about the length of the baking pan.
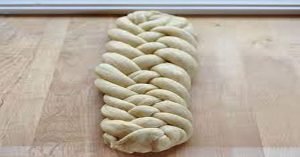
7. Roll the dough very tightly, jelly-roll fashion, beginning at one of the sealed sides. As each small section of the dough is rolled with one hand, seal it with the edge of the palm of your other hand.
Then seal the ends of the loaf with the edge of your palm. Uniform rolling insures a uniform texture in the finished bread.
8. Let the loaf stand for 2 or 3 minutes to permit the dough to relax. Then gently roll it under the palms of your hands to make it long enough to fit the pan.
After you practice this method a few times you will end up with a loaf that is just right to fit the standard bread tin. If the finished roll of dough is too long for the pan, you will have a loaf of bread with humps on the top.
9. Place the loaf in the oiled pan with the sealed side of the dough on top. Shake the pan sideways to help shape the loaf to the pan and to leave a film of fat on what will be the top surface of the loaf. Next, turn the loaf out onto your hand and return it opposite side up, into the pan.
10. Cover with a thin damp cloth and let rise until “ripe” for baking. Keep the cloth moistened while the loaf is
rising. This prevents a dry crust from forming before the dough is baked.
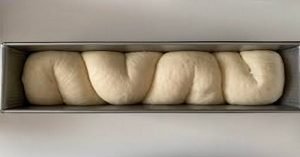
11. Keep the covered loaves at a temperature of 80° to 85°F until they are ready to bake.
12. Put the rising dough on a warm but not hot surface. Too compact texture at the lower part of the loaf may come from leaving the loaf pans on a cold surface while the dough is rising for baking.
